Let me show you how easy it is to hem a bubble dress.
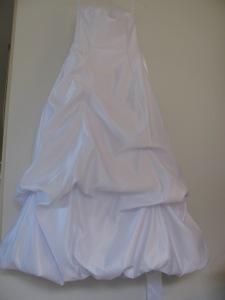
Here is a strapless gown that a customer brought in earlier this week:

Sometimes, if the dress isn’t overly long, I can just tack the dress up at random spots and stitch a bar tack in to hold up the hem.
Most of the time, that is how I hem these bubble dresses.
But this dress needed to be taken up 2-5 inches at various spots around the hem.
It is a very easy process, but I want to tell you a few things along the way.
The bride tried this dress on, and I stuck pins in every 4-6 inches around the hemline:

To clarify, on this type of a hem where alot of fabric needs to be shortened, I am not going to use bar tacks. What you need to do here is take up the same amount from the dress as you do from the lining. To do that, you are just going to sew the seam that attaches the dress to the lining, but just shorter. And you do this alteration by sewing just one seam all the way around.
So, let’s begin.
Once I was ready to start the hem, I made myself a diagram to show myself how much needed to be taken up at the various points on the hem.
I make diagrams because I like the visual.
You may come up with a different system of transferring those measurements.
This is how my little diagram looked:

CF stands for Center Front. CB stands for Center Back. SS stands for Side Seams.
The four darker lines represent side center seams (princess seamlines).
The numbers near each of the lines represent how much needed to be taken up in inches.
Just remember that when you turn the dress inside out, check to make sure that you have the left and right sides of the dress correct. It may now be a mirror image depending on what system you used for keeping track of the measurements
When you look at the hem of a bubble dress, usually, the lining is attached to the dress at the bottom of the hem. The dress side has gathers and the lining side does not. In the photo below, the dress is the puckered side and the lining is smooth:

So, I opened up a seam somewhere where it wouldn’t show or be a bother to the bride.
Here, I decided to open up the center back seam:

When I pulled the dress inside out, I pulled that hemline seam as flat as possible before I began to measure what I need to take up.
Here at the center back, I needed to take up 5 inches, using my seam gauge, so I put a pin at that point:

When I put a pin in place, I poke it through the topside:

and then I poke it through the bottom so that I can see that the seam lines match up:

I’ll put a pin at each corresponding seam and at all the points in between.
You’ll find that this does not have to be done perfectly as you would for a regular dress hem.
But, you do want to make sure that none of the dress is stuck under your presser foot.
So, again to clarify, you’re going to have the front of the dress and the lining right sides together. In the photo below, you see the netting for the dress and underneath where you cannot see, is the lining fabric.
Begin sewing at the center back of the dress and “eyeball” it as you sew along, using the seam gauge to guide my sewing. Use your diagram to show you how much to take up at each spot along the hem. You’re going to sew in one continuous circle all the way around the hem.

You’ll notice that you have much more dress fabric than lining fabric as you sew along the circumference of the dress, so you’ll need to work in gathers as you sew.
I suppose you could spend the time to stitch in a long basting stitch and pull those threads up, but it would take much longer and that isn’t necessary unless it gives you peace of mind.
The good thing is that no one sees the gathers when the dress is hanging.

When you are finished sewing, trim the seam and turn the dress right side out.
Here are how my gathers look. (Top side of the seam line shown below).

Once you turn the dress right side out, just machine stitch that opening closed.
And that’s all there is to it!
If you’d like to do any other alterations to a bubble dress,
here is How To Alter a Bubble Dress and Other “Closed” Garments. I think you’ll find it helpful.
The biggest fear people have in altering a bubble dress is how to get in and tackle it.
Once you know how to get into the dress, you stitch that one seam and you’re done!
Knowing that makes it much less intimidating.
Just have confidence in your ability and you’ll do great!

I CANNOT figure out how to “hem” a bubble dress that has pickups in the skirt. The bridal store wants me to add additional pickups, and I can pin them in. But, I can’t sew them in unseen and have them hold up the skirt. Suggestions? (I also enjoy Beth Moore and attended a simulcast in April…an inspiring day :>)
Sometimes, you can just bar tack the pick ups right where you pinned them. Try that first and see if it works. If not, send me a photo of the dress and I’ll e-mail you some suggestions.
Thanks,
Linda
I’m confused on how to turn the dress inside out with the pickups in the way. It doesn’t really turn inside out flat because you have all the stitching in the way. Help!!!!!
(Author’s note: I sent Jan an e-mail right away, but forgot to post my comment here until now.)
Sometimes, you’ll find a third interlining in these dresses. You may have to go in deeper and once you get in that third layer, yuou can do the alterations. If that is not the case, you may have to take apart the bar tacks that are closest to the spot you need to alter. If you do that, make sure you mark each layer where those have been sewn so that you can reattach the dress in the exact spots after the alteration.
I just got a wedding bubble dres to hem and it has a long train so would I only hem from side seam to side seam? I’m really confused on hemming this dress.
Yes, for the most part, you just hem across the front, side seam to side seam. However, if you have to take up alot of hem (3-4 inches or more), you may have to stitch beyond the side seam into the back area because you want to taper the hem gradually back.
(Wendy wrote back and said she thought these hems are difficult to which I replied):
I may have made it look harder than it is. When I was hemming my daughter’s dress, I noticed that the hem got wider and wider as it went up the skirt. This meant that I had to ease and gather in extra material to make it fit. I twas ok though because no one sees that bottom hem seam. So, don’t get worried if the two layers don’t fit together perfectly. They may not and it’s ok. The main thing is to raise your hem up the appropriate amounts all across the hem.
Hope that helps,
Linda
i purchased a dress for my daughter last week..which was dirt cheep, great fabric and outstanding bodice…she put it on and it looked fantastic from the waist up but dowdy from the waist down….we looked at it and looked at it and decided that just bringing the hem up was not enough…it has a very wide skirt. Laina reminded me of dress i made her when she was a little girl that had a balloon effect hem line…I think the way i did was to line the skirt, gather the hemline with wide basting stitches and then attach the hem to the lining…I haven’t done this in years…does it sound like I am on the right track? I have been researching this and seen dresses on line that have elastic in the hem….this particular dress actually does have a lining though, I feel like my attaching the lining the hem will keep the dress looking dressy.
Please help me…
I think you are on the right track. The only obstacle might be if the dress has many tacks in it that you need to take out and those old marks where the tacks were don’t come out. Does that describe your skirt?
this has been the best site i have found so far to help me think of how i will finish my wedding dress hem!! I am having ‘pick-ups’ and it looks a lot better with a hem that is bubbled rather than dead straight. The pattern for the dress says to have 2 linings, so I will have a middle lining and a lining close to my skin. Do I need to enclose the middle lining in with the ‘outer’ lining?
Should the hem be done before the pickups are stiched?
i hope this makes sense it has been hard to figure out how it will work in my head
Chloe
Hi Chloe,
Wow, you are making your own dress! Good for you? You will be so proud of your accomplishment and it adds such a special part to your already special day.
Ok, I have read what you wrote and the only thing I don’t quite understand is what you mean by enclosing the middle lining with the outer lining. How is it enclosed? Does the pattern give directions for that step? Also, have you already put on the extral lining? If not, does it really need 2 linings? Just wondering. The dresses I have altered only have the main fabric and one lining. If your’ fabric is “see through” then I definitely would have 2 linings.
Yes, hem the dress before you put the pick ups in, definitely!!!
I don’t usually check emails on Sunday, but I’ll be back here Monday to look for your reply.
Hope this helps!
Linda
What about the netting at the hem line? I assume I will need to remove the netting that is sewn into the bottom seam which joins the lining to the main fabric and just move the netting up in line with new hem line?
Thank you, Sue
Have you already sent me a photo? I’m guessing that you shouldn’t have to move the netting, but you are the best judge of that since you can see what is happening with the dress as you pull it up while she’s in the dress.
Let me know if you’re asking me something different than what I am picturing.
Thanks for your comments. I have to take the dress up 5″ – It’s a bridesmaid dress – So it eats up half of the netting – so I think it would ruin the way it will hang.
Thanks again for answering.
Sue
Are you altering all the bridesmaid dresses? If not, you don’t want your customer’s dress to look different than the other bridesmaids. Your customer might want to ask the bride if it’s ok to take off that tulle (netting) first! The netting might be the reason the bride chose the dress in the first place.
Yes I am altering all the bridesmaid dresses. I am leaving the tulle in – I think the dresses need it and the bride has left it up to me. Finished 2 of them and they look great. Thanks again for your comments.
Great! That sounds excellent. Glad to help.
Thank you for your help. Seems easy now that you explained it. I have worked on many gowns over the years but never this style. The gown is my daughters and needs to be hemmed about 5 inches, maybe six. Not at all what I thought she would pick, but looks lovely.
I have struggled with bridal bubble hems forever..this tutorial made me laugh when I realized just how easy they can be..thank you for the best tip ever.